Bolt-On vs. Weld-On Cutting Edges for Loader Bucket
Pros, cons, real install times, tooling required, and the cost-per-hour math that determines which system makes more sense for your operation.
The choice between a bolt-on and a weld-on cutting edge for a loader bucket comes down to one number most equipment managers never calculate: the total cost of putting the machine back to work. Part price is only one piece of that number. Labor time, shop scheduling, welding equipment, and machine downtime are the others. This guide breaks down both systems on every factor that affects your actual cost per operating hour.
How Each System Works
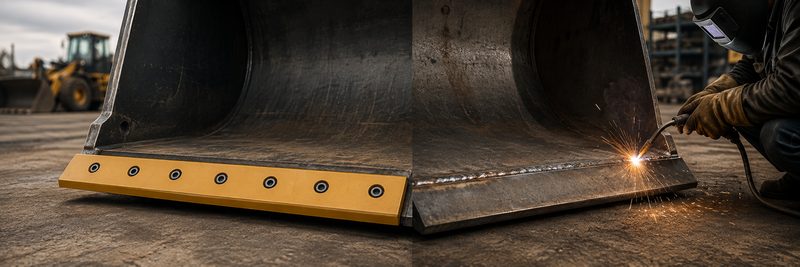
A bolt-on cutting edge is a separate, hardened steel wear part that bolts to the front lip of the loader bucket. When it wears out, you remove the bolts, slide out the old edge, and bolt on a new one. The bucket stays intact. The edge is the consumable, not the bucket.
A weld-on cutting edge is permanently fused to the bucket lip. When it wears out, the replacement process requires cutting or grinding the old edge off, prepping the bucket lip, fitting the new edge, preheating the steel, and welding the new edge on. The bucket is part of the repair every time.
That structural difference drives every other comparison in this guide. A bolt-on system treats the cutting edge as a scheduled replacement item that an operator can handle in the field. A weld-on system treats the cutting edge as part of the bucket structure, which means every replacement cycle involves a welder, a shop, and unplanned downtime.

Many loaders arrive from the factory with a weld-on base edge that has pre-drilled holes for a bolt-on wear edge. In this configuration, the base edge stays welded and only the bolt-on wear section is replaced. This hybrid setup gives you the field-serviceability of bolt-on with a stable weld-attached base. It is the most common production setup on mid-size and large wheel loaders today.
Installation Time and Tooling Required
This is where the two systems diverge most sharply. Installation time translates directly to machine downtime, labor cost, and whether the replacement can be scheduled or requires a shop visit.
| Factor | Bolt-On Edge | Weld-On Edge |
|---|---|---|
| Typical installation time | 30 to 60 minutes | 3 to 6 hours (shop); longer in field |
| Where it can be done | Field or shop; no facility required | Shop strongly preferred; field weld is difficult and higher risk |
| Skill required | Any operator or mechanic | Qualified welder required |
| Tools required | Impact wrench or breaker bar, torque wrench | Angle grinder, cutting wheel, welder, preheat torch or oven, temperature sticks, clamps, slag hammer, wire brush |
| Preheat required? | No | Yes — 300 to 400 F for hardened AR plate |
| Post-weld cooling time | None | 30 to 60 minutes minimum; bucket should not return to service while hot |
| Can it be done during a shift break? | Yes, in most cases | No |
| Risk of bucket damage during replacement | Low | Moderate — grinding and heat can affect bucket lip integrity |
Installation times are field estimates based on industry practice for mid-size wheel loader buckets. Smaller buckets may be faster; larger mining-class buckets longer. Weld-on times assume a qualified shop welder using proper preheat procedure on a standard AR400 edge.
A bolt-on edge can be swapped in the field with an impact wrench and a torque wrench. TVH and other industry sources cite change times under one hour as typical for trained personnel. A weld-on replacement done in the field — without a preheat oven and proper welding setup — carries a real risk of hydrogen-induced cold cracking in the heat-affected zone, which can fail days after the repair without warning.
The Weld-On Process in Detail
Understanding the full scope of a weld-on replacement helps explain why the downtime cost is significantly higher than the part cost alone. A correctly executed weld-on installation on a hardened AR400 edge involves the following steps in sequence.

Step 1 — Remove the Old Edge
If the old edge is worn to replacement, it must be cut off using a cutting wheel or plasma cutter, then ground flush with the bucket lip. On a bucket lip that has seen multiple weld-on cycles, there may be weld buildup that requires additional grinding to restore a clean, flat seating surface. This step alone typically takes 30 to 60 minutes depending on the bucket size and weld condition.
Step 2 — Clean and Prep the Seating Surface
The bucket lip must be free of rust, mill scale, grease, paint, and moisture. Any contamination in the weld zone introduces hydrogen into the weld pool, which is the primary cause of cold cracking in hardened steel joints. Wire brushing and grinding to bare metal are required before the new edge can be fitted.
Step 3 — Fit and Tack
The new edge must be clamped in position as tightly as possible to the bucket lip before tacking. Poor fit-up creates gaps in the weld joint that are difficult to fill cleanly with a single-pass fillet weld on thick plate. Steel bars or clamps are used to hold the edge flat against the bucket during tacking. Tack welds are placed on 6-inch centers, starting at the ends and working toward the center, to minimize thermal distortion.
Step 4 — Preheat
AR400 and harder cutting edge steel must be preheated to 300 to 400 F before welding. Skipping preheat on hardened steel is the single most common cause of weld failure on cutting edge replacements. Preheat reduces the thermal gradient between the weld pool and the surrounding steel, slowing the cooling rate and allowing hydrogen to diffuse out of the joint rather than becoming trapped. A Tempilstik or infrared thermometer is used to verify temperature before welding begins.
Step 5 — Weld
The weld is run in staggered passes using a low-hydrogen process: E7018 SMAW electrode or ER70S-6 GMAW wire are the standard consumables. The stagger pattern (12 inches at one end, 12 inches at the opposite end, then center) prevents heat concentration and controls distortion. Each pass must be cleaned of slag before the next pass begins. Interpass temperature must be maintained within the preheat range throughout.
Step 6 — Post-Weld Cooling
Completed weldments on AR plate should be wrapped in insulating blanket or placed in a slow-cooling environment for at least 30 to 60 minutes. Rapid quenching of the weld zone significantly increases hydrogen cracking risk. The bucket should not return to service until the weld area has cooled completely and been visually inspected for cracking.
The full sequence — from cutting off the old edge to the machine returning to work — typically runs 3 to 6 hours in a properly equipped shop. For operations considering a move to bolt-on, Equipment Blades carries AR400 and Hardox wear steel edges in bolt-on profiles ready to ship. Field welding adds time and risk to every step. A 2026 Construction Equipment article on wear part management noted that what appears less expensive on paper can quickly become the higher-cost option once labor, equipment downtime, and scheduling are factored in.
Cost-Per-Hour Comparison
The part price is only one component of the total replacement cost. The table below models a typical mid-size wheel loader cutting edge replacement cycle using industry-standard labor rates and realistic downtime estimates.
| Cost Component | Bolt-On Edge | Weld-On Edge |
|---|---|---|
| Edge part cost (example, AR400) | $300–$600 | $200–$500 |
| Labor — installation | 0.5–1 hr at $75–$100/hr = $37–$100 | 3–6 hrs at $75–$100/hr = $225–$600 |
| Welder rate premium | None — any mechanic or operator | $15–$30/hr premium for certified welder typical |
| Consumables (wire, gas, grinding wheels) | Bolts and nuts only ($15–$30) | $40–$80 per replacement cycle |
| Machine downtime cost | 30–60 min lost production | Half-day to full-day lost production |
| Reversible (second wear face)? | Yes — doubles total edge life at no added part cost | No — weld-on edges have one wear face |
| Total cost per replacement (parts + labor) | ~$350–$730 | ~$465–$1,180 |
| Cost per wear face (reversible bolt-on) | ~$175–$365 per face | ~$465–$1,180 per face |
Figures are illustrative estimates based on industry labor rates and field practice. Actual costs vary by bucket size, edge thickness, welder availability, and shop overhead rates. Machine downtime cost is excluded from the totals above — at $150–$300 per machine-hour for a mid-size wheel loader in production, the gap between the two systems widens further when downtime is included.
The reversible bolt-on edge is the factor that most dramatically changes the per-face economics. A double-bevel bolt-on edge flipped at mid-life gives you two full wear cycles from one part purchase. On a weld-on edge, every wear cycle is a new part and a new full installation sequence. Equipment Blades stocks certified Hardox wear parts in bolt-on profiles for wheel loaders.
Most operations account for the part cost and the welder's hourly rate. They do not account for the machine sitting idle while the weld cools, the time spent sourcing a qualified welder on short notice, or the productivity lost when the replacement cannot be scheduled ahead. In fleet operations where machines run tight production schedules, unplanned downtime is almost always more expensive than the part itself.
Pros and Cons Side by Side
- Swapped in 30 to 60 minutes by any mechanic or operator
- No welding equipment, preheat, or certified welder required
- Can be done in the field during a shift break
- Reversible double-bevel design doubles wear life per part
- Consistent edge profile throughout service life
- No heat-affected zone risk to bucket lip from repeated welding cycles
- Easy to schedule; replacement planned, not reactive
- Bolt hole wear and loose hardware are the primary failure modes — both detectable at inspection
- Higher per-part price than weld-on at the same steel grade
- Requires correct bolt pattern match to bucket or base edge
- Bolt heads are exposed and will wear in highly abrasive conditions
- Lower per-part price at the same steel grade
- No bolt holes means cleaner edge profile in rock and snagging material
- No loose hardware risk during operation
- Appropriate for custom bucket profiles where bolt-on parts are not available
- Good fit for operations where welding capability is already in-house and machines have predictable, long wear cycles
- Requires 3 to 6 hours per replacement in a properly equipped shop
- Qualified welder and welding equipment required for every change
- Preheat and post-weld cooling mandatory on AR-grade plate
- Field replacement is high-risk without proper equipment
- Repeated welding cycles add heat stress to the bucket lip over time
- Not reversible — one wear face per installation
Which System Fits Which Operation
Neither system is universally better. The right choice depends on your bucket configuration, the availability of welding capability, how frequently edges need to change, and how tightly the machine is scheduled.
- Bolt-on is the correct choice
- Frequent edge changes need to happen fast with minimal planning
- Reversible edge doubles the interval between part orders
- Shop capacity stays available for mechanical work, not scheduled weld jobs
- Bolt-on is strongly preferred
- No welder or welding equipment available on site
- Field weld on AR plate without preheat equipment carries high cracking risk
- Bolt-on swap requires only an impact wrench and torque wrench
- Bolt-on preferred for ease of scheduling and tracking replacement cycles
- Reversible edge supports procurement planning and budget forecasting
- In-house shop with a full-time welder may support weld-on for lower-cycle machines
- See loader edges
- Weld-on may be appropriate if edges last a full season or longer
- Fewer replacements reduce the frequency of installation labor
- Shop welding capability is available and not a bottleneck
- Material is not highly abrasive — long intervals make the weld process manageable
- Bolt-on preferred for serviceability; AR500 bolt-on edges available
- Short wear intervals make weld-on labor costs prohibitive
- Reversible edges reduce per-face cost in high-replacement-rate operations
- Weld-on may be used for custom mining bucket profiles where bolt-on parts do not fit
- Bolt-on strongly preferred
- No in-house welding between jobs; edge changes happen in the yard between rentals
- Bolt pattern standardization across the fleet simplifies parts stocking
- Operator-level changeouts reduce labor overhead
The Reversible Edge Advantage
Reversible bolt-on edges are double-bevel, meaning both the top and bottom faces are beveled to a usable wear profile. When the first face wears down, the edge is flipped to expose a fresh face and reinstalled with new bolts. One part purchase gives you two full wear cycles.
The economics are straightforward. If a single-face weld-on edge costs $350 installed and a reversible bolt-on edge costs $450 installed for the first face and $75 in labor for the flip, the reversible bolt-on delivers two wear cycles for $525 total versus $700 for two weld-on cycles. That gap widens further when downtime cost is included, and wider still as the machine's replacement frequency increases.
The key to getting full value from a reversible edge is timing the flip correctly. The edge should be flipped before the bevel on the first face is fully consumed. Once the bevel flattens out completely, the second face will not wear evenly and you lose part of the benefit. A good rule is to flip at 50 to 60 percent of the expected total service life, based on your tracked replacement interval data.
Always replace bolts when flipping or changing an edge. Bolts that have been in service under load have pre-stressed threads and reduced clamping force. Reusing them puts a compromised fastener under full load from the first shift. New hardware at every change is not optional — it is the difference between a correctly tensioned installation and one that will scallop and loosen within 50 hours.
Hardware, Torque, and Bolt Selection
Bolt-on cutting edge performance depends entirely on hardware quality and correct installation torque. The edge is a wear part. The bolts are the system holding it. Loose hardware is the most common cause of premature bolt-on edge failure and the easiest to prevent. Equipment Blades stocks Grade 8 plow bolt hardware in the sizes required for standard cutting edge applications.
Bolt Grade
Use Grade 8 plow bolts only. Grade 5 hardware does not have the shear strength required for cutting edge service loads and will fail under normal operating conditions. Plow bolts have a flat countersunk head that sits flush or below the wear surface, reducing the rate at which the bolt head itself wears down. Standard hex head bolts are not appropriate for this application.
Torque Specifications
Correct torque by bolt size for Grade 8 plow bolts in cutting edge applications:
- 5/8 inch: 150 to 180 ft-lbs
- 3/4 inch: 260 to 300 ft-lbs
- 7/8 inch: 420 to 460 ft-lbs
- 1 inch: 600 to 650 ft-lbs
Re-Torque After Break-In
Re-torque all hardware after the first 8 to 10 operating hours. Bolts seat against the wear surface and the bucket lip under initial load and lose some pre-load as they do. A re-torque at break-in restores clamping force before micro-movement can begin. Skip this step and you will see early scalloping around bolt holes on an otherwise correctly installed edge.
Countersunk Holes
Many bolt-on edges come with deep countersunk holes that keep the bolt head below the wear surface. This is the correct design for high-abrasion applications. As the edge wears, the countersink maintains protection for the bolt head and reduces the rate of hardware wear. Edges with shallow countersinks or through-holes with exposed hardware will wear the bolt heads faster in rock or abrasive aggregate.
Converting a Weld-On Bucket to Bolt-On
Many older loader buckets were manufactured with a plain weld-on base edge and no holes. Converting to a bolt-on system is practical and cost-effective for most bucket sizes. The conversion involves one shop visit and produces a bucket that can be serviced with hand tools for its remaining service life.
The conversion process:
- Inspect the existing base edge. If it still has adequate thickness and is not cracked or severely distorted, it can become the base for a bolt-on system. If it is badly worn, it needs to be replaced with a new weld-on base edge with holes before the bolt-on wear section is installed.
- Drill the bolt hole pattern. Standard patterns use 5/8 inch or 3/4 inch holes on 6-inch centers. Drilling hardened AR plate requires carbide-tipped bits and a slow, steady feed rate. Carbide inserts or a plasma/laser cut pattern are faster alternatives for shop production.
- Install the bolt-on wear edge. The bolt-on section drops over the base and is secured with Grade 8 plow bolts. Re-torque after 8 to 10 hours.
The one-time cost of the conversion is typically offset within one or two replacement cycles through reduced labor and downtime on subsequent changes. Equipment Blades can supply bolt-on edges pre-drilled to standard patterns and can advise on hole sizing for your bucket. If you are unsure which edge fits your machine, use the parts finder or contact the team through the custom manufacturing page or call 605-368-5221.
Frequently Asked Questions
A bolt-on cutting edge is a hardened steel wear part that attaches to the front lip of a loader bucket using plow bolts rather than welding. When the edge wears out, you remove the bolts and replace the edge without touching the bucket itself. Most bolt-on edges are double-bevel and reversible, giving two full wear cycles from one part. They can be swapped in 30 to 60 minutes in the field by any mechanic or operator with an impact wrench and a torque wrench.
A bolt-on edge is fastened with bolts and can be removed and replaced without welding. A weld-on edge is permanently fused to the bucket lip and requires cutting, grinding, and re-welding to replace. Bolt-on edges take 30 to 60 minutes to swap in the field. Weld-on replacements typically take 3 to 6 hours in a properly equipped shop and require a qualified welder, preheat equipment, and low-hydrogen welding consumables. When total labor, downtime, and part cost are factored in, bolt-on systems are usually less expensive per wear face over a full replacement cycle.
A standard bolt-on edge change on a mid-size wheel loader takes 30 to 60 minutes for a trained mechanic or operator. The steps are: remove old bolts, slide off the worn edge, clean the seating surface, slide on the new edge, install new Grade 8 plow bolts at specified torque, and re-torque after the first 8 to 10 operating hours. No welding equipment, preheat, or specialized trade skill is required. The machine can return to service immediately after installation.
A full weld-on edge replacement on a hardened AR400 loader cutting edge typically takes 3 to 6 hours in a properly equipped shop. The steps include: cutting or grinding off the old edge, cleaning and prepping the bucket lip, fitting and tacking the new edge, preheating the steel to 300 to 400 F, welding in a staggered sequence with low-hydrogen consumables, and allowing 30 to 60 minutes of controlled post-weld cooling before the bucket returns to service. Field replacement without proper preheat equipment significantly increases the risk of delayed cracking in the heat-affected zone.
For most loader applications, yes. A correctly torqued bolt-on edge on a properly prepared seating surface provides adequate clamping force for standard digging, grading, and loading operations. The bolt-on edge is the consumable wear part; it is not a structural member of the bucket. Weld-on edges have a slight advantage in applications involving extreme lateral shock loads or heavy rock impact, where a fastened joint may flex more than a fused one. For the majority of wheel loader work in construction, aggregate handling, and municipal operations, bolt-on systems perform equivalently to weld-on at a lower total replacement cost.
Use Grade 8 plow bolts only. Plow bolts have a flat countersunk head that sits flush or below the wear surface, reducing bolt head wear during operation. Grade 5 bolts do not have sufficient shear strength for cutting edge service loads. Torque to specification by bolt diameter: 5/8 inch at 150 to 180 ft-lbs, 3/4 inch at 260 to 300 ft-lbs, 7/8 inch at 420 to 460 ft-lbs, and 1 inch at 600 to 650 ft-lbs. Always re-torque after the first 8 to 10 operating hours and replace bolts at every edge change.
Yes, in most cases. If the existing base edge has adequate remaining thickness and is not cracked or distorted, bolt holes can be drilled into it on standard 6-inch center spacing. A bolt-on wear section then installs over the base. If the base edge is too worn, it is replaced with a new weld-on base with holes, and subsequent wear edges are changed by bolting only. The one-time cost of conversion is typically recovered within one or two replacement cycles through reduced labor and downtime on every future edge change.
A reversible bolt-on edge is double-bevel — both the top and bottom faces are machined to a usable wear profile. When the first face wears down, the edge is unbolted, flipped over, and reinstalled with new hardware to expose the fresh second face. One part purchase delivers two full wear cycles. Flip the edge before the bevel on the first face is fully consumed; once it flattens out, the second face will not seat or wear evenly. Replace bolts with new hardware every time — never reuse bolts after they have been in service.
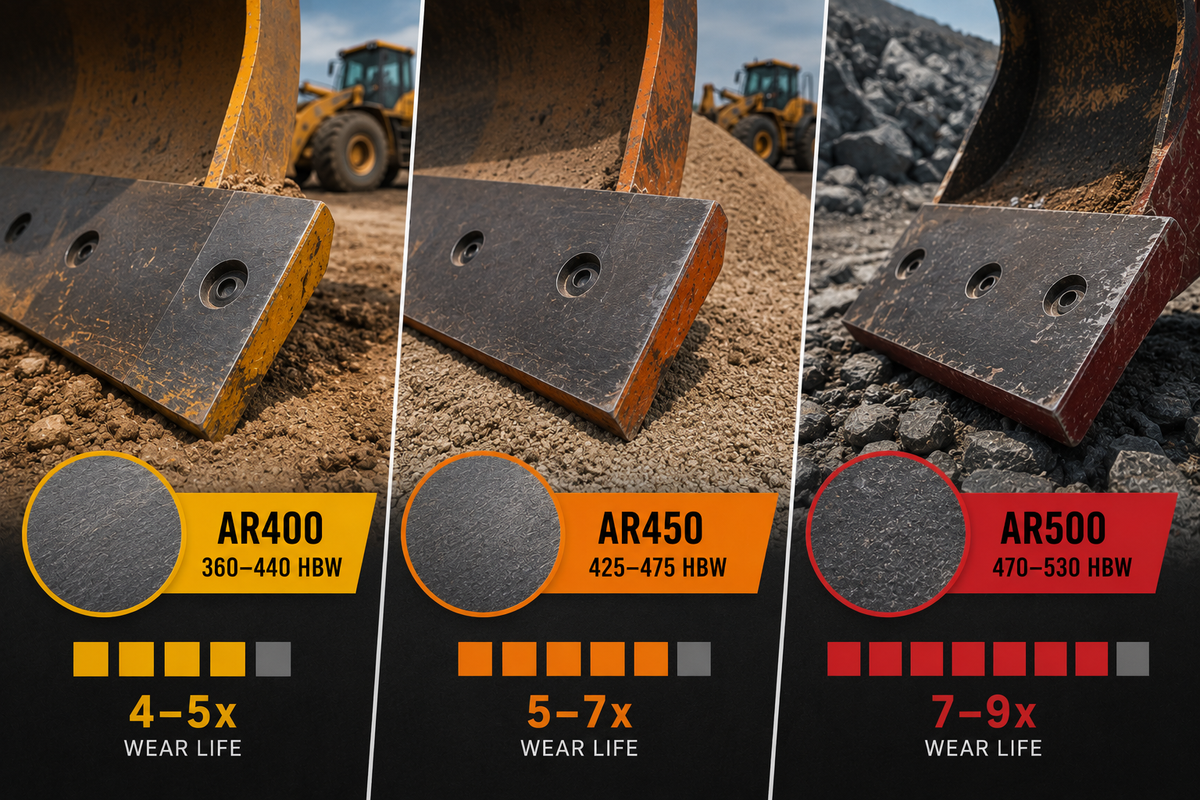
AR400 (or certified Hardox 400) is the correct starting point for most construction, aggregate, and municipal loader applications. It provides 4 to 5 times the wear life of mild steel and handles the combination of sliding abrasion and impact loading that loader bucket edges typically see. Step up to AR450 or AR500 when AR400 replacement intervals are too short for your material type, particularly in fine sand, high-silica ore, or hard-rock operations. Equipment Blades stocks certified Hardox bolt-on edges in standard loader profiles with a 1-week turnaround.
Scalloping around bolt holes is caused by loose hardware allowing the edge to micro-shift under load. The bolt holes act as stress concentration points, and the relative movement between the edge and the bucket lip accelerates wear at each hole location. Check that bolts were torqued to the correct specification at installation and re-torqued after the first 8 to 10 hours. If scalloping is already present, replace the current edge and install the next set with new Grade 8 plow bolts torqued to specification, with a confirmed re-torque on schedule.